22 Nov, 2019
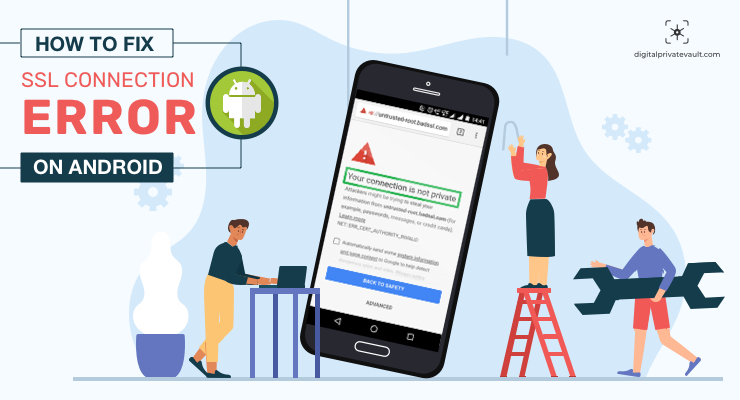
You might be browsing regularly on your phone but one day you are struck with the error: “Your connection is not private”. And this is preventing you from accessing any website. Well, that’s quite common with Android Devices — it’s called SSL connection error. And in this article, we’ll show you five ways to fix it.
But before we get into the solution, let’s understand what is SSL and why it matters for secure browsing.
SSL stands for Secure Socket Layer, a security protocol that encrypts the connection between the server and your browser. To put it simply — it makes your browsing secure and protected.
Without the SSL/TSL(Transport Layer Security), any third party can access the information you provide on the website such as your email ID or passwords.
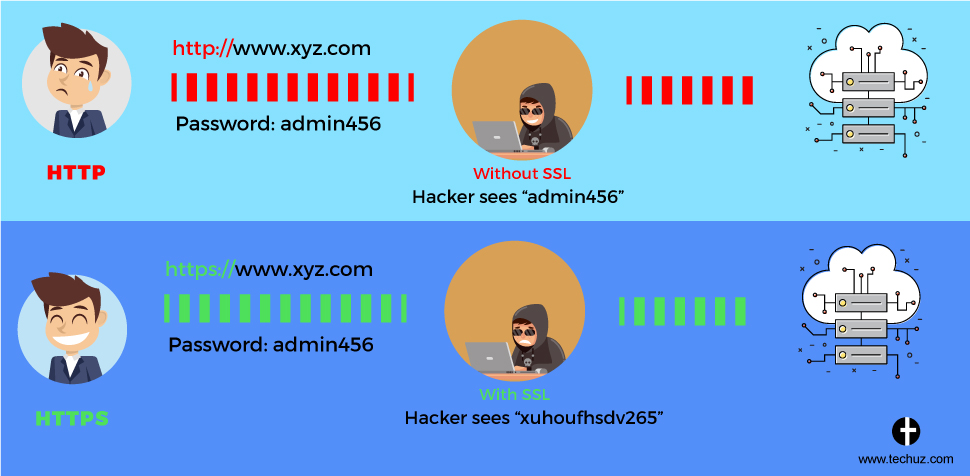
(Source – Techuz)
So when you get SSL connection error, it means the internet connection on your phone is preventing the browser from loading the page for security and privacy.
Android: https://play.google.com/store/apps/details?id=game.mind.teaser.smartbrain
iOS: https://apps.apple.com/in/app/smart-brain-iq-logic-puzzles/id1535521299
But what if you are facing such error with a secure website that you frequently visit?
Your browser generally displays this error when you access a website without SSL/TSL certificate. So first you need to check if it’s your device or the website that’s causing the issue. You can diagnose it by accessing SSL secured websites such as Google, Facebook or YouTube. If you can not access any of those websites, the issue is on your end. Here’s how you can fix it.
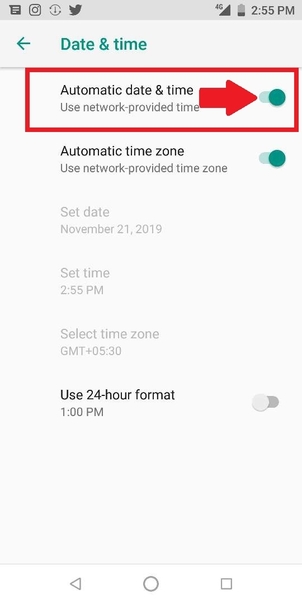
Many times the reason for an SSL connection error is as simple as a mismatch between your device’s and the web server’s time & date. Especially when the dates are different. To fix this error all you need to do is to enable automatic time and date set up in the settings.
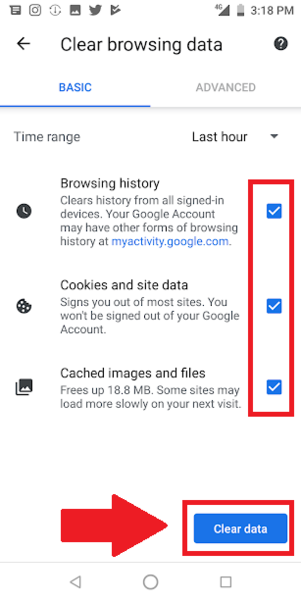
Another solution that you can try to fix the SSL error is clearing the browser’s history and data. Sometimes the stored cache and cookies can cause SSL error and you can clear it in the browser’s settings. Here’s how you can do it in Chrome.
If you have installed antivirus or a security app on your mobile, chances are it might be interfering with the browser. Any antivirus application with the feature to block unsecured or malicious websites may even cause SSL connection error. Try disabling it and access the browser again.
Another reason for the SSL error can be an insecure public WiFi. If you are connected to a public WiFi, try disconnecting it and connect to a private WiFi or phone’s internet. It should fix the problem.
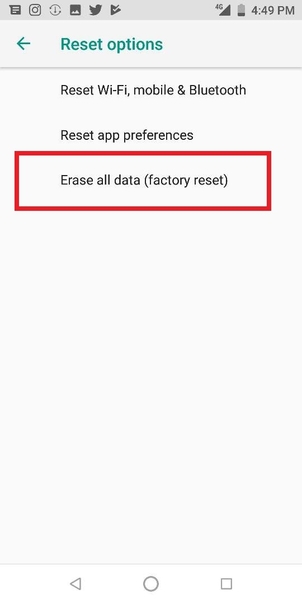
If none of the above solutions works for you and the issue still persists, the last thing you can do is resetting your device. Factory reset will delete all the data on your phone and enable the factory default settings just like a new phone.
However, before you reset your phone make sure to back up data as it will be deleted in the process.
Since you are here, check Digital Private Vault, a gallery vault app that helps you store and hide your confidential data on your smartphone.
 77753
77753 By Goldy Benedict
  By Goldy Benedict